Script
Script is expected to be injected into the parts HTML table generated by Rebrickable.
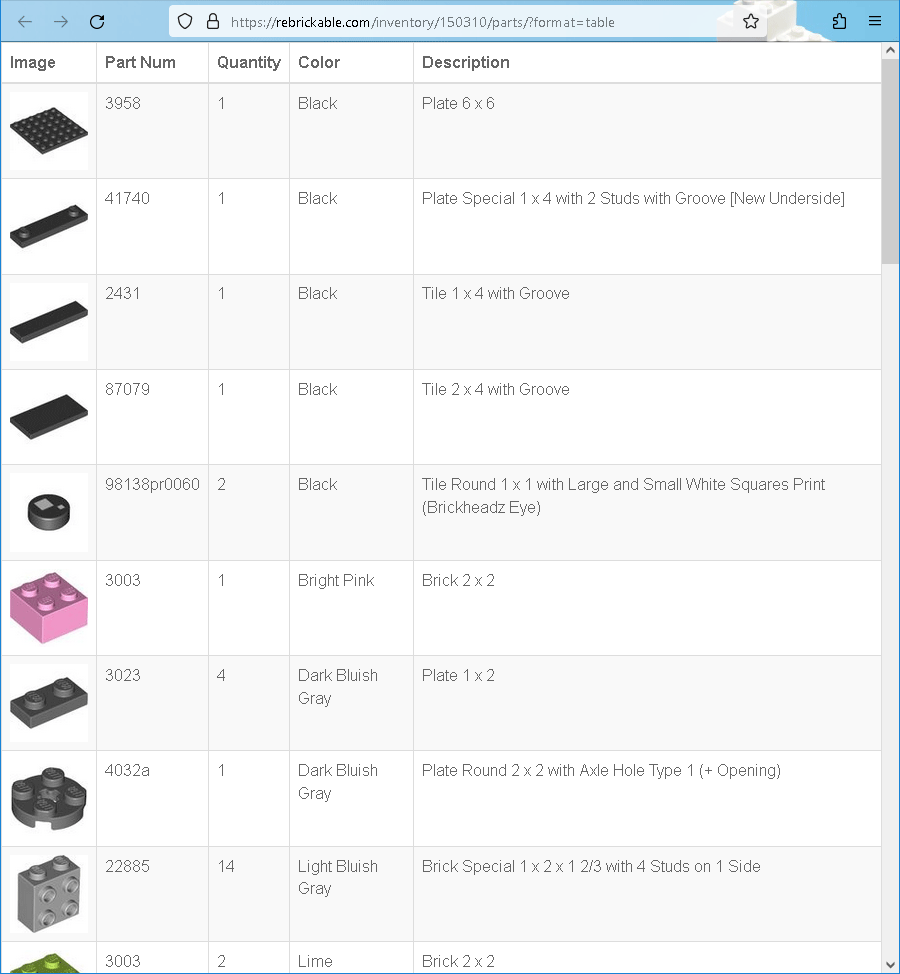
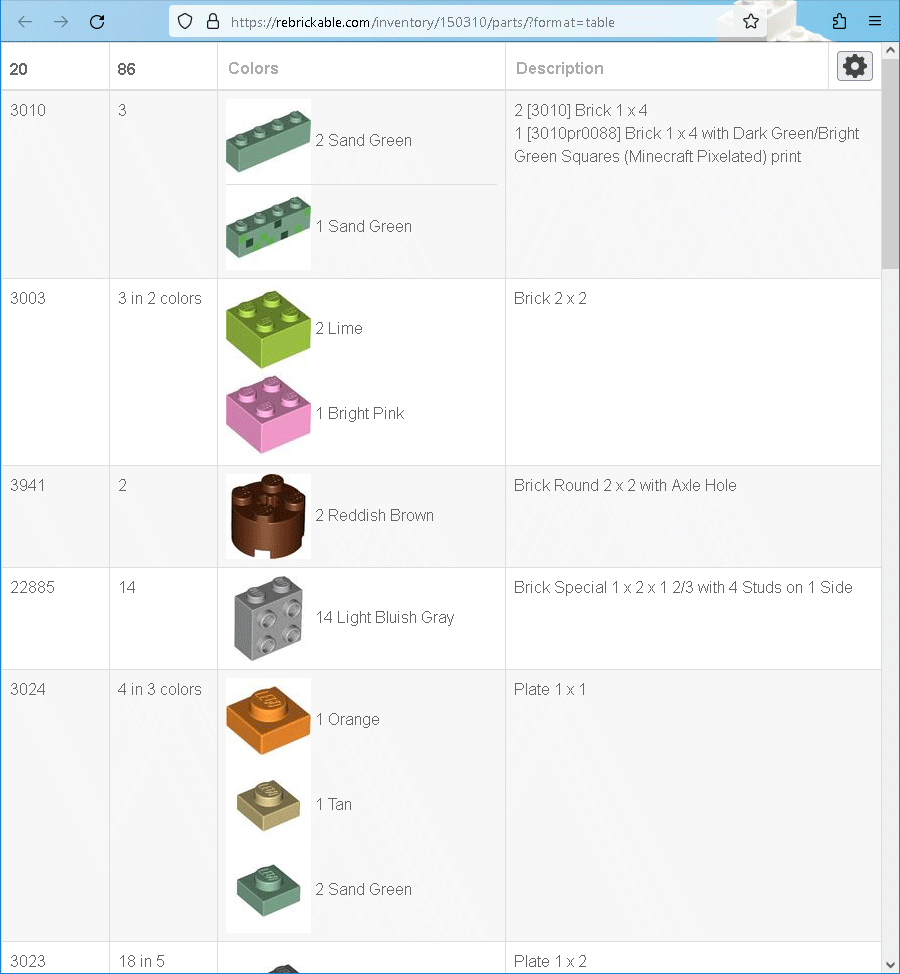
Here is an example for the parts HTML table of the Set 40624:
| Before | After |
|---|---|
 |
 |
Structure of the table and configuration options are described in the Help. This page describes only installation of the script.
Userscript Installation
Userscript is the most powerful way to use this script. Once installed, you will have RBmerge functionality in HTML tables exported from the following pages:
- Inventories (Sets, MOCs, Alternate Builds)
My LEGO→All My PartsMy LEGO→My Part ListsMy LEGO→My Part Lists→<Some-List>My LEGO→My Lost PartsMy LEGO→My Custom Lists→<Some-List>Sets→Compare Sets
I.e. you just click there Export Parts → HTML Table and instead of plain table you get a merged one.
To get this working you will need a userscript manager.
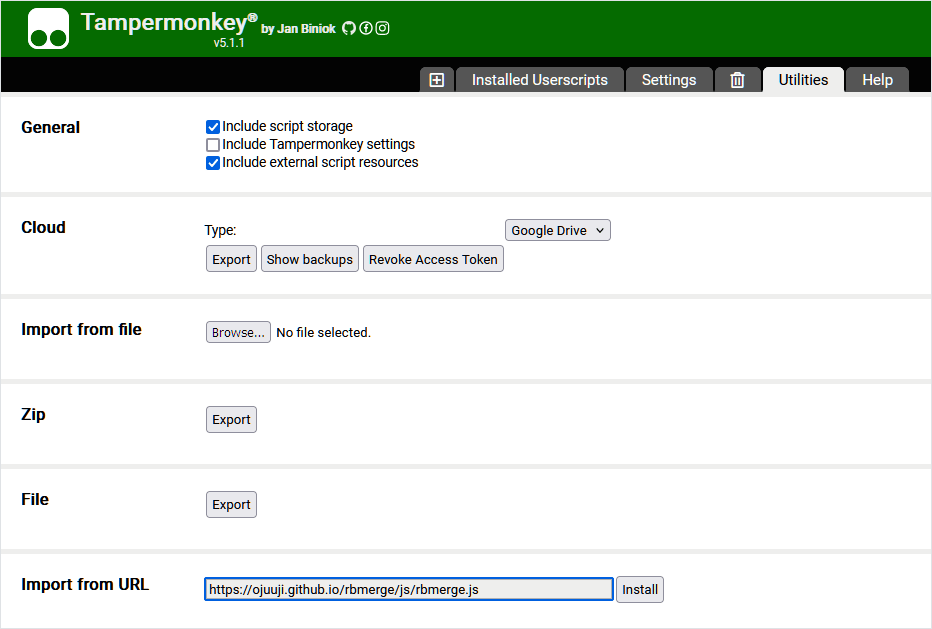
For example, to install script in Tampermonkey, open its Dashboard, then go to Utilities tab, paste rbmerge.js URL in edit box Import from URL and click Install button:

Userscript manager handles auto update for the scripts, so you will not need to do anything else.
Manual Installation
In this guide will be used HTML table with all your parts. This was actually very first usage scenario of RBmerge, before an app and userscript were introduced.
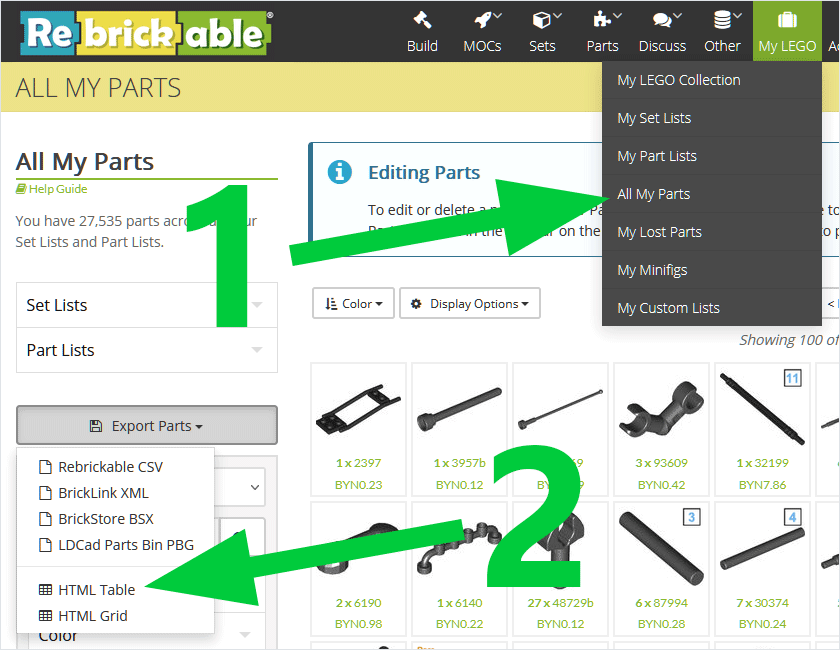
So, first you need to export all your parts as HTML table. Log in to Rebrickable and go to My LEGO → All My Parts → Export Parts → HTML Table:

This will load a table with all your parts.
Save it to a file, and, when saving, select “HTML Only” (available in all major browsers). Now open saved HTML file in a text editor and add this line before closing </body> tag (for the info, '+' (plus) sign at the beginning of the line is used for highlighting and should not be added to the file):
 <script type="text/javascript" src="https://rebrickable.com/static/plugins/jquery/jquery-3.5.1.min.js"></script>
 <script type="text/javascript" src="https://rebrickable.com/static/plugins/lazyload/jquery.lazyloadxt.extra.min.js"></script>
+<script type="text/javascript" src="https://ojuuji.github.io/rbmerge/js/rbmerge.js"></script>
 </body>
That’s all. Now you have single HTML file, which requests all necessary assets from the Internet. Normally it requests them only once and then they are cached, so after the first open you should be able to use it without the Internet access.
Alternatively, if you want to keep assets locally, you can select “Complete Webpage” when saving HTML. In this case browser saves all assets to <filename>_files directory placed along with the saved HTML file. You can download rbmerge.js to this directory and refer it in the saved HTML file the following way. In this example HTML was saved as My Parts.html:
 <script type="text/javascript" src="My Parts_files/jquery-3.5.1.min.js"></script>
 <script type="text/javascript" src="My Parts_files/jquery.lazyloadxt.extra.min.js"></script>
+<script type="text/javascript" src="My Parts_files/rbmerge.js"></script>
 </body>
However note that even in the second case images will be downloaded from the Internet instead of using local copies. To prevent this without using extra tools you can do, for example, the following.
Before saving complete HTML you need to scroll table to the end to force browser to download and display all images. Use the PageDown key to make all images to be visible and thus downloaded. I.e. do not use, for example, the End key otherwise some images may be missing. Tip: you can zoom out the page as much as possible so visible area will contain maximum possible number of images and you will need to press the PageDown key fewer times.
Then, after saving complete HTML, when editing it also remove jquery.lazyloadxt script:
 <script type="text/javascript" src="My Parts_files/jquery-3.5.1.min.js"></script>
-<script type="text/javascript" src="My Parts_files/jquery.lazyloadxt.extra.min.js"></script>
+<script type="text/javascript" src="My Parts_files/rbmerge.js"></script>
 </body>
This way it becomes truly local and never performs any Internet requests.